Introduction
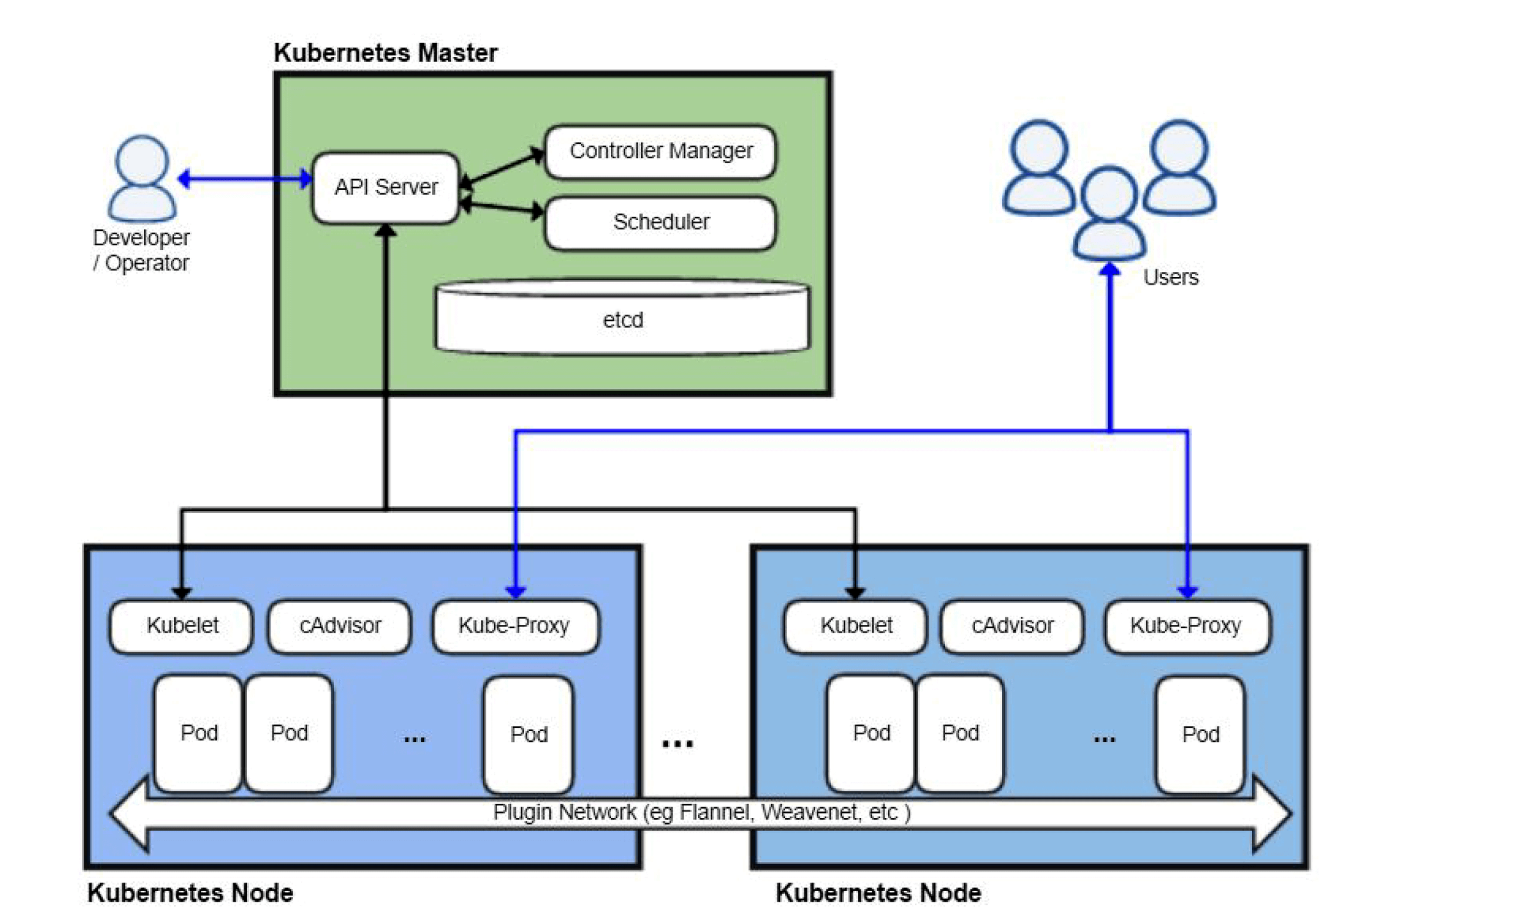
While Docker handles containerization by packaging applications with their dependencies, Kubernetes elevates this to orchestration at enterprise scale. Kubernetes is the de facto standard for managing containerized workloads in production, providing automated deployment, scaling, self-healing, and resource optimization across distributed systems.
Why Kubernetes for Data Engineering?
Modern data pipelines require:
Kubernetes delivers all of these through its robust architecture:
Key Components:
If you've mastered Kubernetes fundamentals and want to deploy production-grade data orchestration platforms, this guide walks through a complete Apache Airflow implementation on Kubernetes with real-world configurations and troubleshooting.
Prerequisites and Environment Setup
System Requirements
Enabling Kubernetes on Docker Desktop (Local Development Cluster)
Docker Desktop provides a single-node Kubernetes cluster ideal for development and testing before deploying to production environments.
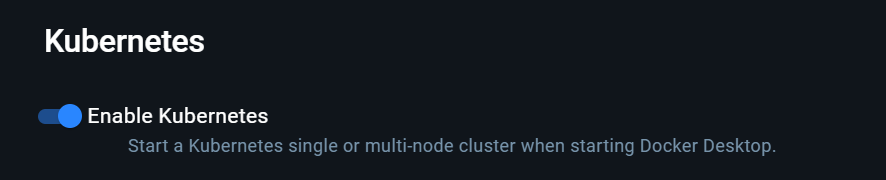
Note: Allow 5-10 minutes for Kubernetes cluster initialization. Docker Desktop configures kubectl context automatically.
Installing and Configuring kubectl (Cluster Control Interface)
kubectl is the command-line interface for interacting with Kubernetes clusters. It communicates with the Kubernetes API server to deploy applications, inspect resources, and manage cluster operations.
Note: This guide covers Windows installation. For other platforms (Linux, macOS, package managers), refer to the official Kubernetes documentation for platform-specific installation methods.
Installation on Windows
Download the kubectl binary:
curl.exe -LO "https://dl.k8s.io/release/v1.28.0/bin/windows/amd64/kubectl.exe"Verify checksum:
certutil -hashfile kubectl.exe SHA256
type kubectl.exe.sha256
Verify installation:
kubectl version --client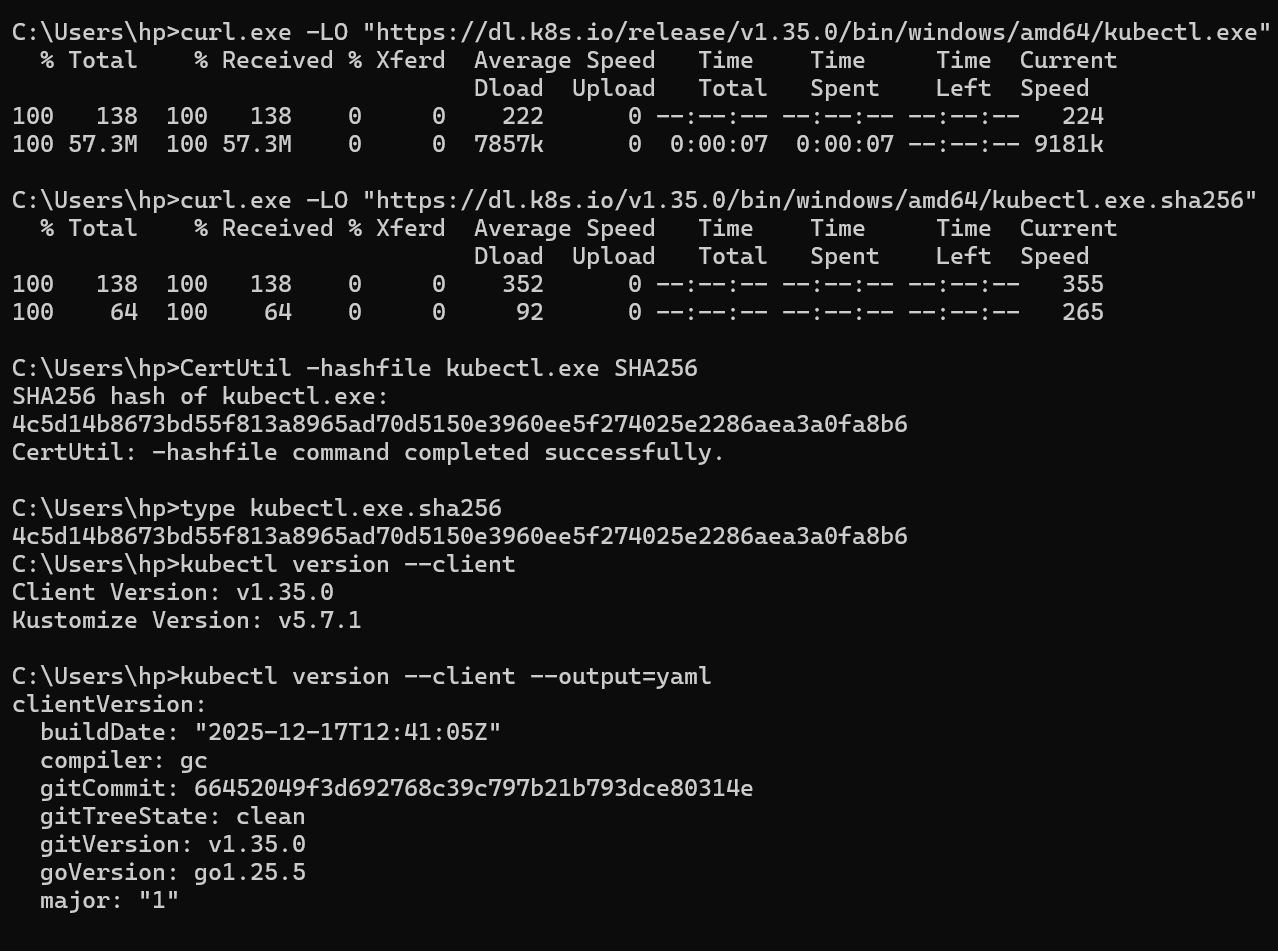

Essential kubectl Commands
kubectl cluster-info

# List all pods
kubectl get pods -A

# Check node status
kubectl get nodes

# Watch pod status in real-time
kubectl get pods -n <namespace> -w

# View pod logs
kubectl logs -n <namespace> <pod-name>

# Restart deployment
kubectl rollout restart deployment -n <namespace> <deployment-name>
Setting Up Helm (Package Manager for Kubernetes)
Helm simplifies Kubernetes application deployment by packaging resources into charts. Instead of managing dozens of YAML manifests manually, Helm charts provide templated, versioned, and reusable deployments with configurable values.
Installation
Download Helm from https://helm.sh/docs/intro/install/ and verify:
helm version
Adding Airflow Repository
helm repo add apache-airflow https://airflow.apache.org
helm repo update
Deploying Kubernetes Dashboard (Visual Cluster Management)
The Kubernetes Dashboard provides a web-based interface for monitoring cluster health, viewing resource utilization, debugging deployments, and managing workloads without command-line tools. Essential for visualizing pod status, logs, and events.
Deployment
Apply the official dashboard manifests:
kubectl apply -f https://raw.githubusercontent.com/kubernetes/dashboard/v2.7.0/aio/deploy/recommended.yaml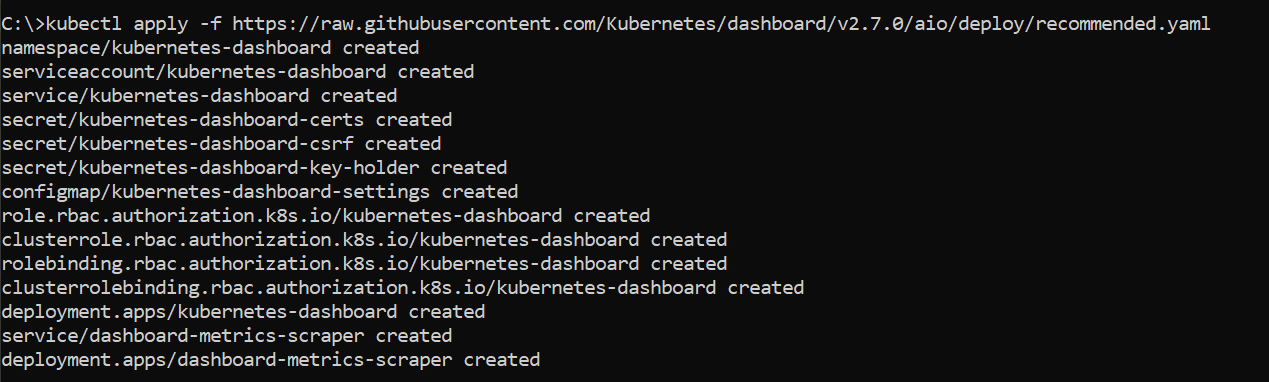
Configuring RBAC (Role-Based Access Control for Security)
RBAC controls who can access the dashboard and what actions they can perform. Without proper RBAC configuration, the dashboard has read-only access. We create a ServiceAccount with cluster-admin privileges for full management capabilities.
Create three YAML files for access control:
dashboard-adminuser.yaml
apiVersion: v1
kind: ServiceAccount
metadata:
  name: admin-user
  namespace: kubernetes-dashboard
dashboard-clusterrole.yaml
apiVersion: rbac.authorization.k8s.io/v1
kind: ClusterRoleBinding
metadata:
  name: admin-user
roleRef:
  apiGroup: rbac.authorization.k8s.io
  kind: ClusterRole
  name: cluster-admin
subjects:
- kind: ServiceAccount
  name: admin-user
  namespace: kubernetes-dashboard
dashboard-secret.yaml
apiVersion: v1
kind: Secret
metadata:
  name: admin-user
  namespace: kubernetes-dashboard
  annotations:
    kubernetes.io/service-account.name: "admin-user"
type: kubernetes.io/service-account-token
Apply configurations:
kubectl apply -f dashboard-adminuser.yaml
kubectl apply -f dashboard-clusterrole.yaml
kubectl apply -f dashboard-secret.yaml

Accessing the Dashboard
Start kubectl proxy:
kubectl proxy
Access at:
http://localhost:8001/api/v1/namespaces/kubernetes-dashboard/services/https:kubernetes-dashboard:/proxy/#/login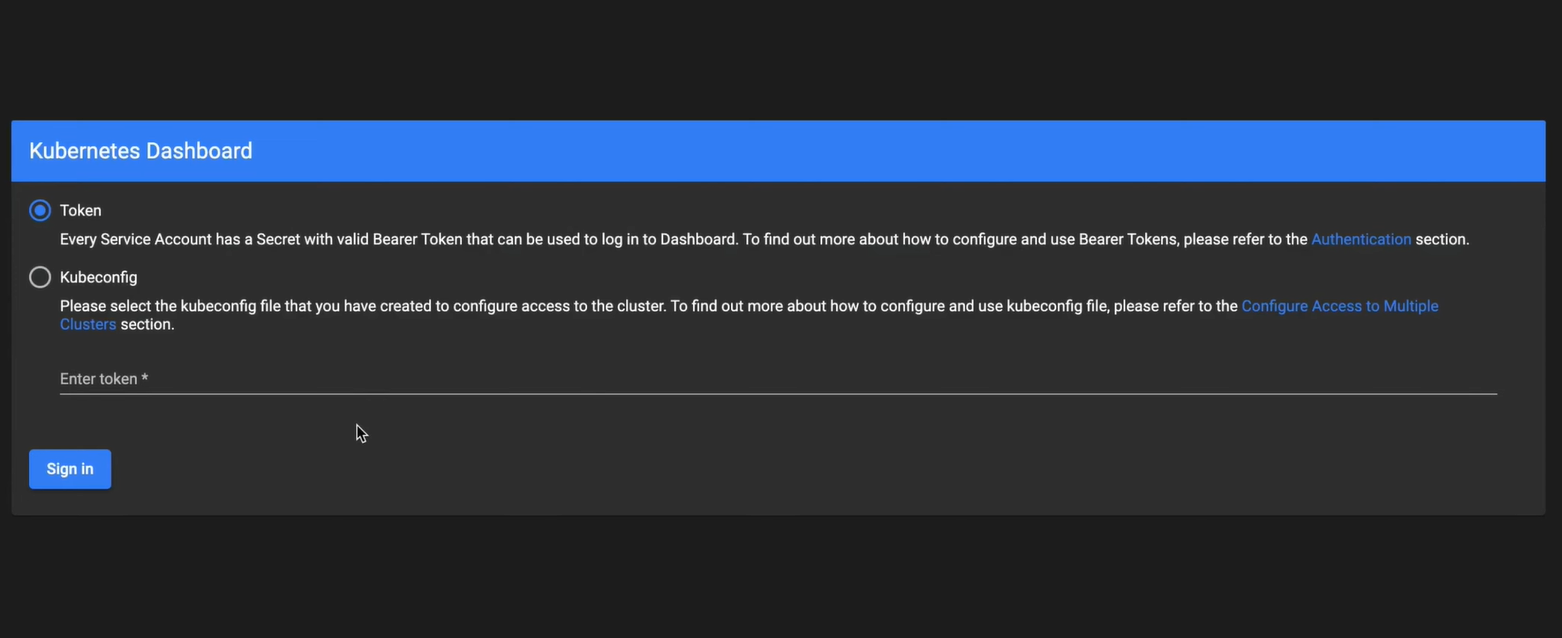
Generating Access Token (Authentication for Dashboard Login)
Kubernetes uses token-based authentication for dashboard access. The token verifies your identity and permissions.
Windows PowerShell:
kubectl get secret admin-user -n kubernetes-dashboard -o jsonpath="{.data.token}" `
| ForEach-Object { [System.Text.Encoding]::UTF8.GetString([System.Convert]::FromBase64String($_)) }
Alternative command:
kubectl -n kubernetes-dashboard create token admin-user
Use the generated token to log in.
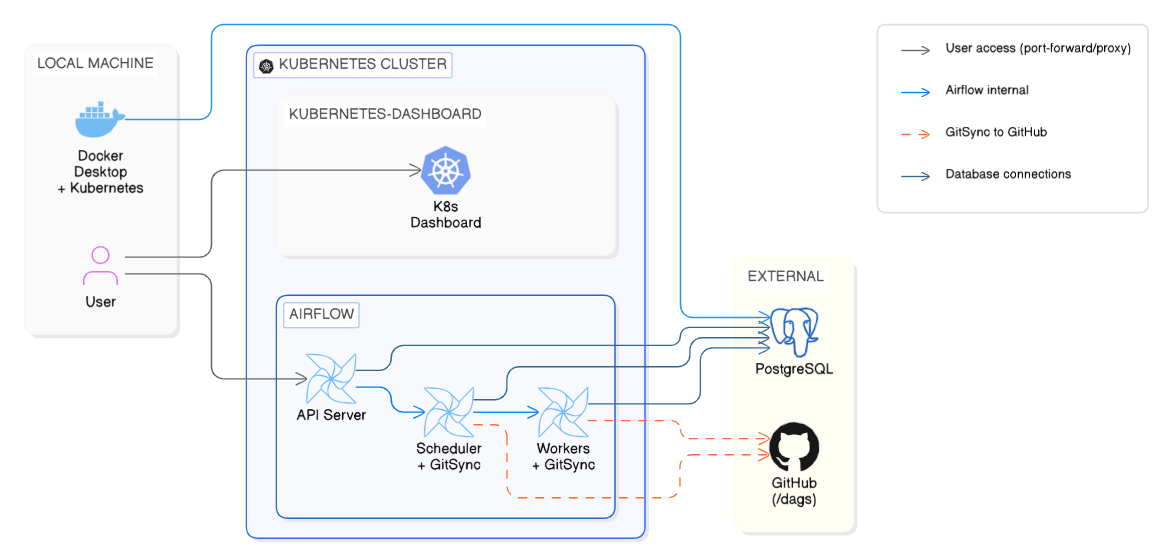
Deploying Apache Airflow on Kubernetes (Scalable Workflow Orchestration)
Apache Airflow orchestrates complex data workflows through Directed Acyclic Graphs (DAGs). Deploying on Kubernetes provides enterprise-grade capabilities that transform Airflow into a production-ready orchestration platform:
Architecture Considerations
Executor Options:
External PostgreSQL Setup (Metadata Database Isolation)
Airflow stores DAG metadata, task states, and execution history in PostgreSQL. Running PostgreSQL externally (outside Kubernetes) simplifies troubleshooting, enables database backups independent of cluster state, and avoids image pull issues common with bitnami images.
Run PostgreSQL in Docker:
docker run -d --name postgres-airflow \
  -e POSTGRES_USER=airflow \
  -e POSTGRES_PASSWORD=airflow \
  -e POSTGRES_DB=airflow \
  -p 5432:5432 \
  postgres:15-alpine
Installing Airflow with Helm
Basic installation (if embedded PostgreSQL works):
helm install airflow apache-airflow/airflow \
  --namespace airflow \
  --create-namespace \
  --timeout 15m \
  --debug
Note: If you encounter an error like "repo airflow not found", add the repository first:
helm repo add apache-airflow https://airflow.apache.org
helm repo update
Installation with external PostgreSQL (Windows one-liner):
helm install airflow apache-airflow/airflow --namespace airflow --create-namespace --timeout 15m --set postgresql.enabled=false --set data.metadataConnection.user=airflow --set data.metadataConnection.pass=airflow --set data.metadataConnection.protocol=postgresql --set data.metadataConnection.host=host.docker.internal --set data.metadataConnection.port=5432 --set data.metadataConnection.db=airflow --debugConfiguration with values.yaml (Customizing Airflow Deployment)
Export default values:
helm show values apache-airflow/airflow > values.yamlEdit values.yaml for your environment:
fernetKey: "<your-fernet-key>"
webserverSecretKey: "<your-secret-key>" // same as fernet-key
executor: "KubernetesExecutor"

postgresql:
  enabled: false

data:
  metadataConnection:
    user: airflow
    pass: airflow
    protocol: postgresql
    host: host.docker.internal
    port: 5432
    db: airflow

dags:
  gitSync:
    enabled: true
    repo: https://github.com/yourusername/your-repo.git
    branch: main
    rev: HEAD
    depth: 1
    maxFailures: 0
    subPath: "dags"
Retrieving Fernet Key (Windows):
$fernetKey = kubectl get secret --namespace airflow airflow-fernet-key -o jsonpath="{.data.fernet-key}"
[System.Text.Encoding]::UTF8.GetString([System.Convert]::FromBase64String($fernetKey))
Apply configuration:
helm upgrade --install airflow apache-airflow/airflow \
  --namespace airflow \
  --create-namespace \
  -f values.yaml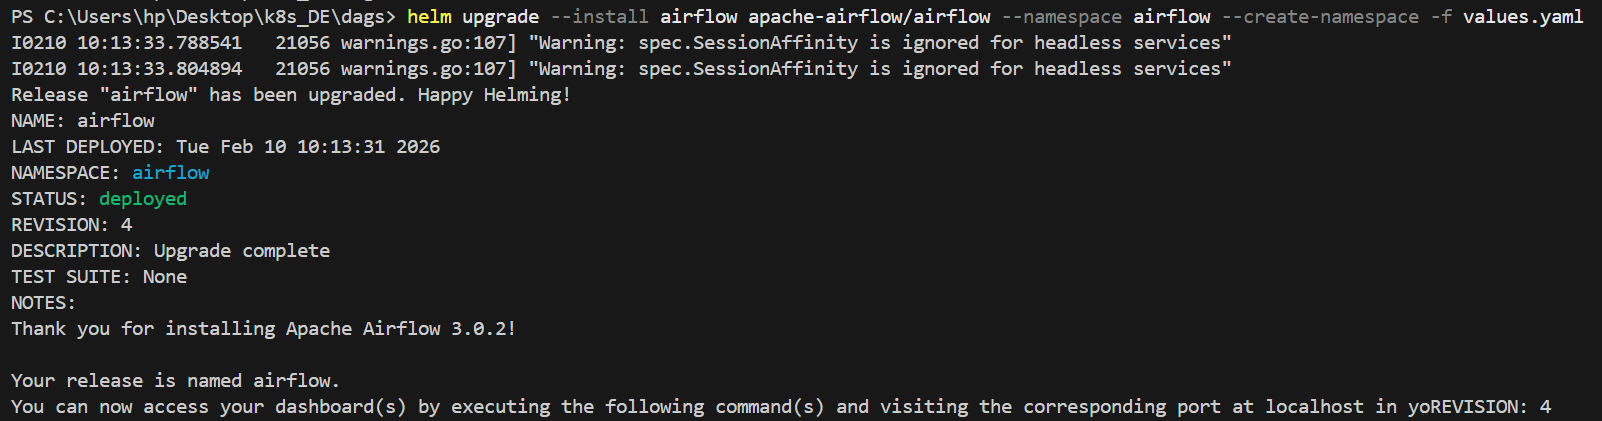
Monitoring Deployment (Verifying Pod Health and Readiness)
Watch pod status:
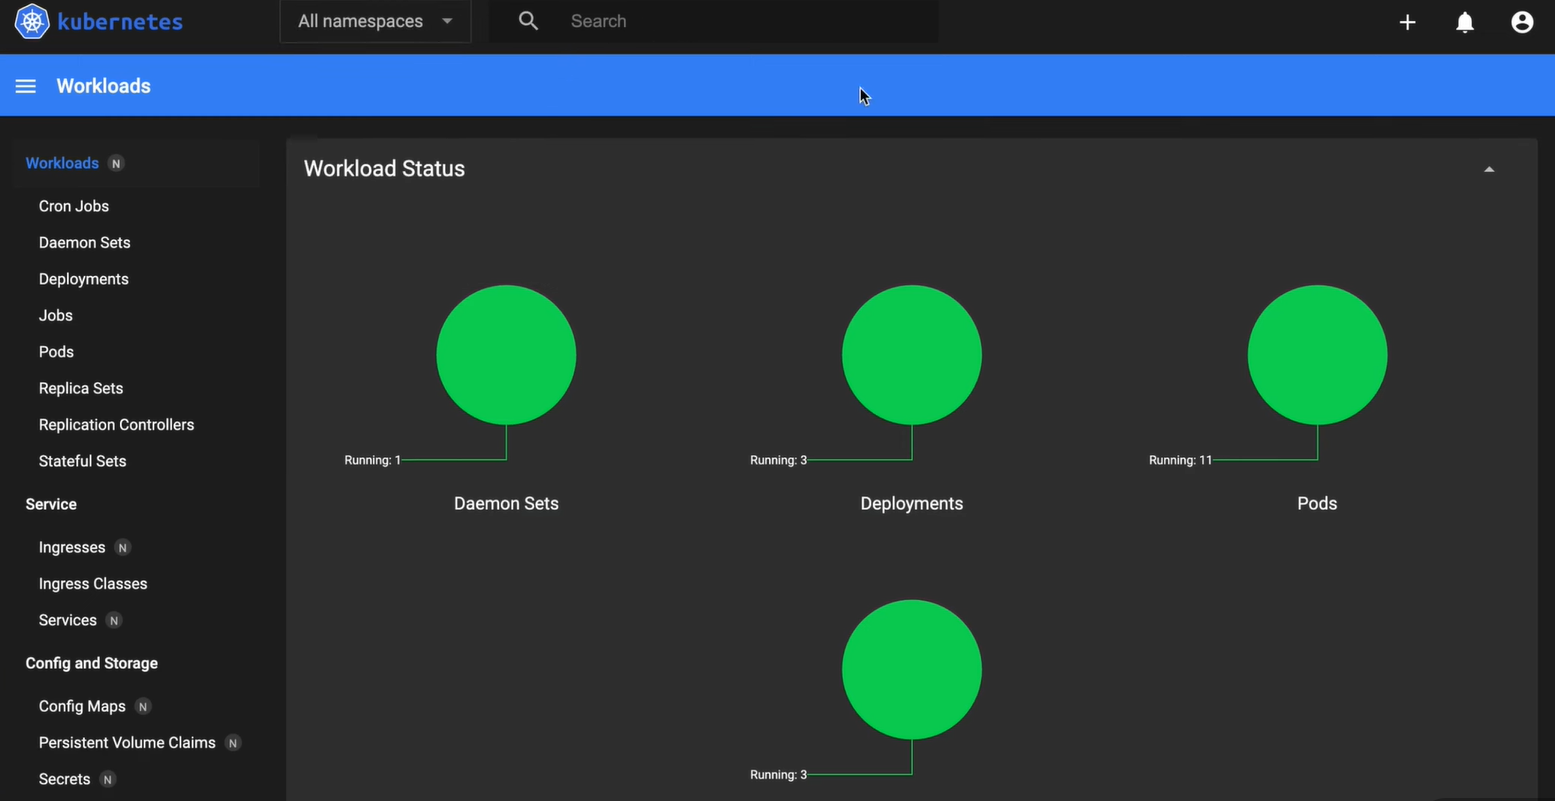
kubectl get pods -n airflow -wWait for all pods to reach Running state. You can verify the deployment status in the Kubernetes Dashboard:
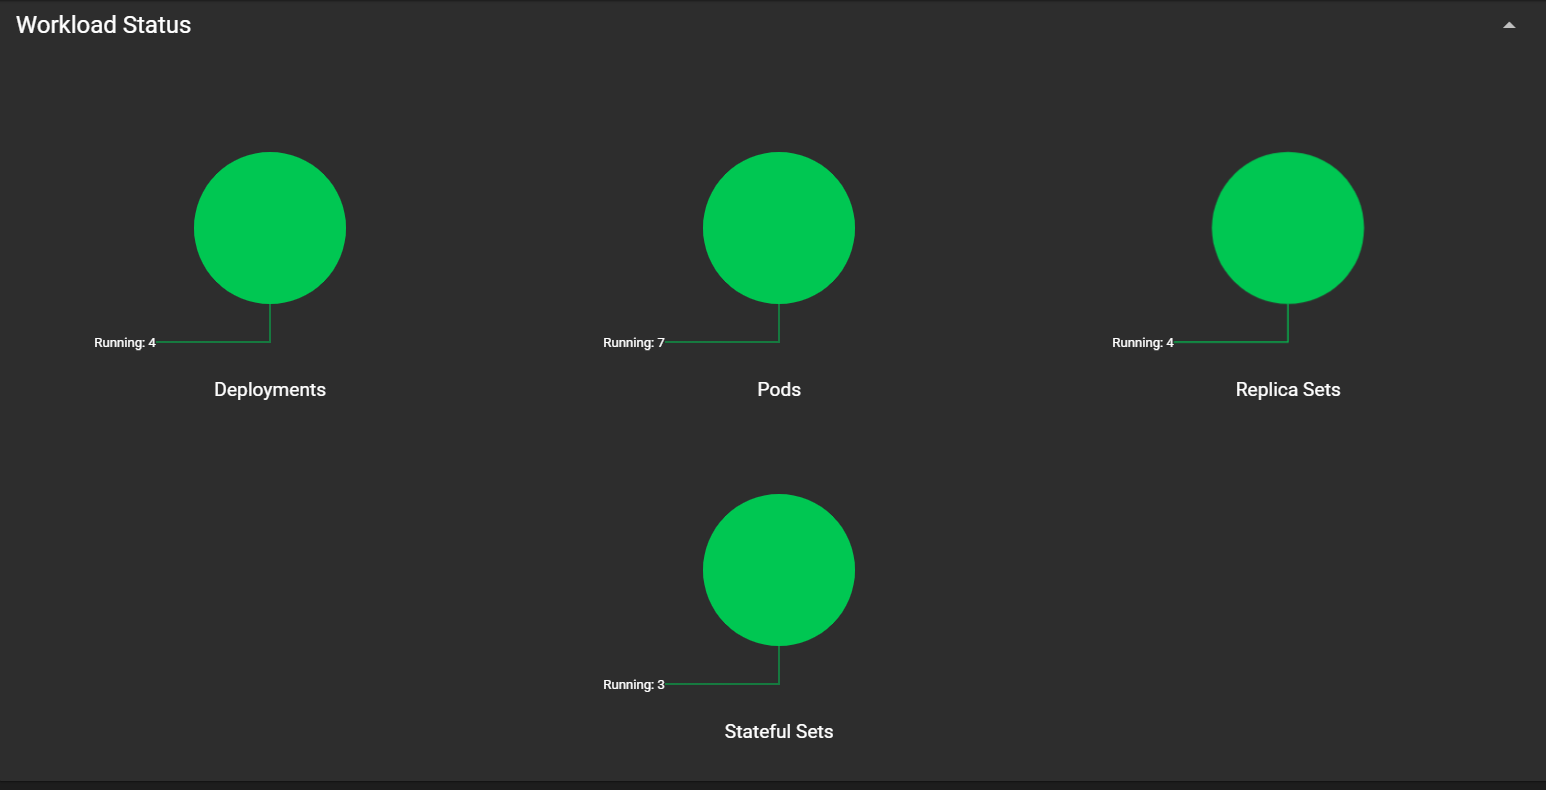
All deployments, pods, and services should show green status indicators once the installation completes successfully.
Accessing Airflow UI (Workflow Management Interface)
Port Forwarding (Exposing Services Locally)
Port forwarding creates a secure tunnel from your local machine to a Kubernetes service. This avoids exposing services publicly while enabling local development and debugging.
Airflow 3.x uses API server instead of traditional webserver:
kubectl port-forward svc/airflow-api-server 8080:8080 --namespace airflow
Access at: http://localhost:8080
Troubleshooting
If API server fails:
kubectl rollout restart deployment -n airflow airflow-api-server
kubectl logs -n airflow -l component=api-server --tail=100
Creating and Deploying DAGs (Building Data Workflows)
Example DAG: hello_world.py
from airflow import DAG
from airflow.operators.bash import BashOperator
from datetime import datetime, timedelta

default_args = {
    'owner': 'datamasterylab.com',
    'start_date': datetime(2026, 9, 2),
    'catchup': False
}

dag = DAG(
    'hello_world',
    default_args=default_args,
    schedule=timedelta(days=1)
)

t1 = BashOperator(
    task_id='print_hello',
    bash_command='echo "Hello World"',
    dag=dag
)

t2 = BashOperator(
    task_id='print_dml',
    bash_command='echo "Data Mastery Lab"',
    dag=dag
)

t1 >> t2
Example DAG: fetch_and_preview.py
from airflow import DAG
from airflow.operators.python import PythonOperator
import requests
import json
import pandas as pd
from datetime import datetime, timedelta

def get_data(**kwargs):
    url = 'https://raw.githubusercontent.com/username/repo/main/data.csv'
    response = requests.get(url)

    if response.status_code == 200:
        df = pd.read_csv(url, header=None, names=['col1', 'col2', 'col3'])
        json_data = df.to_json(orient='records')
        kwargs['ti'].xcom_push(key='data', value=json_data)
    else:
        raise Exception(f"Failed to fetch data. Status code: {response.status_code}")

def preview_data(**kwargs):
    output_data = kwargs['ti'].xcom_pull(key='data', task_id='get_data')
    if output_data:
        output_data = json.loads(output_data)
        df = pd.DataFrame(output_data)
        print(df.head())
    else:
        raise ValueError("No data found in XCom")

default_args = {
    'owner': 'datamasterylab.com',
    'start_date': datetime(2026, 9, 2),
    'catchup': False
}

dag = DAG(
    'fetch_and_preview',
    default_args=default_args,
    schedule=timedelta(days=1)
)

get_data_task = PythonOperator(
    task_id='get_data',
    python_callable=get_data,
    dag=dag
)

preview_data_task = PythonOperator(
    task_id='preview_data',
    python_callable=preview_data,
    dag=dag
)

get_data_task >> preview_data_task
Deploying DAGs via GitSync (Version Control Integration)
GitSync automatically pulls DAG files from a Git repository, enabling:
Deployment Workflow:
The complete workflow involves creating a GitHub repository, pushing your DAG files to a dags folder, configuring GitSync in your values.yaml, and letting Airflow automatically synchronize and execute your workflows:
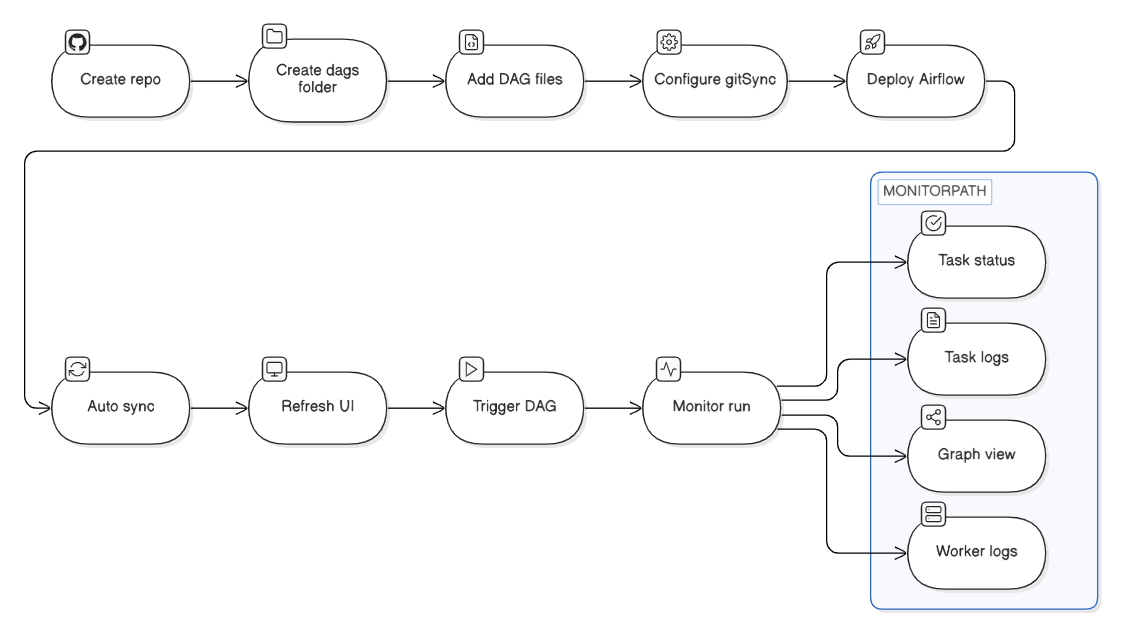
The GitSync process runs continuously as a sidecar container in the scheduler and worker pods, ensuring your DAGs stay synchronized with the latest repository changes.
Verifying DAG Execution (Debugging and Monitoring Workflows)
Check DAG parsing:
kubectl logs -n airflow -l component=dag-processor --tail=50Monitor task execution:
kubectl logs -n airflow -l component=scheduler --tail=100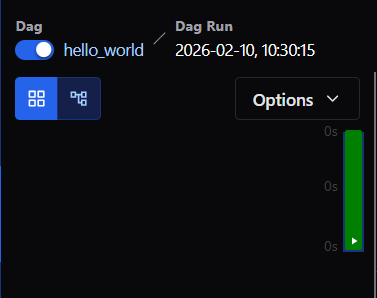

Security
Conclusion
Through this implementation, we've gained hands-on experience with critical production skills:
These foundational techniques form the backbone of modern data engineering infrastructure at scale.